Hey there! Coinvise is a web3 platform that helps creators & communities build and manage their Social Tokens. You can join the community here. If you find this essay interesting, make sure to subscribe to this newsletter and follow Coinvise on Twitter. Enjoy! 🔥
On Coinvise, you can create a Social Token in few clicks and receive them directly in your Crypto Wallet. However, your Token will appear in your Wallet without any logo (usually simply the Token's name on a colorful background).
If you want to add an image to your Token, you'll have to update your Etherscan Social Profile. There are many steps to do it, but if you follow this step-by-step tutorial, you should have it done in under 15mins.
Without further ado, let's jump into it! 💪
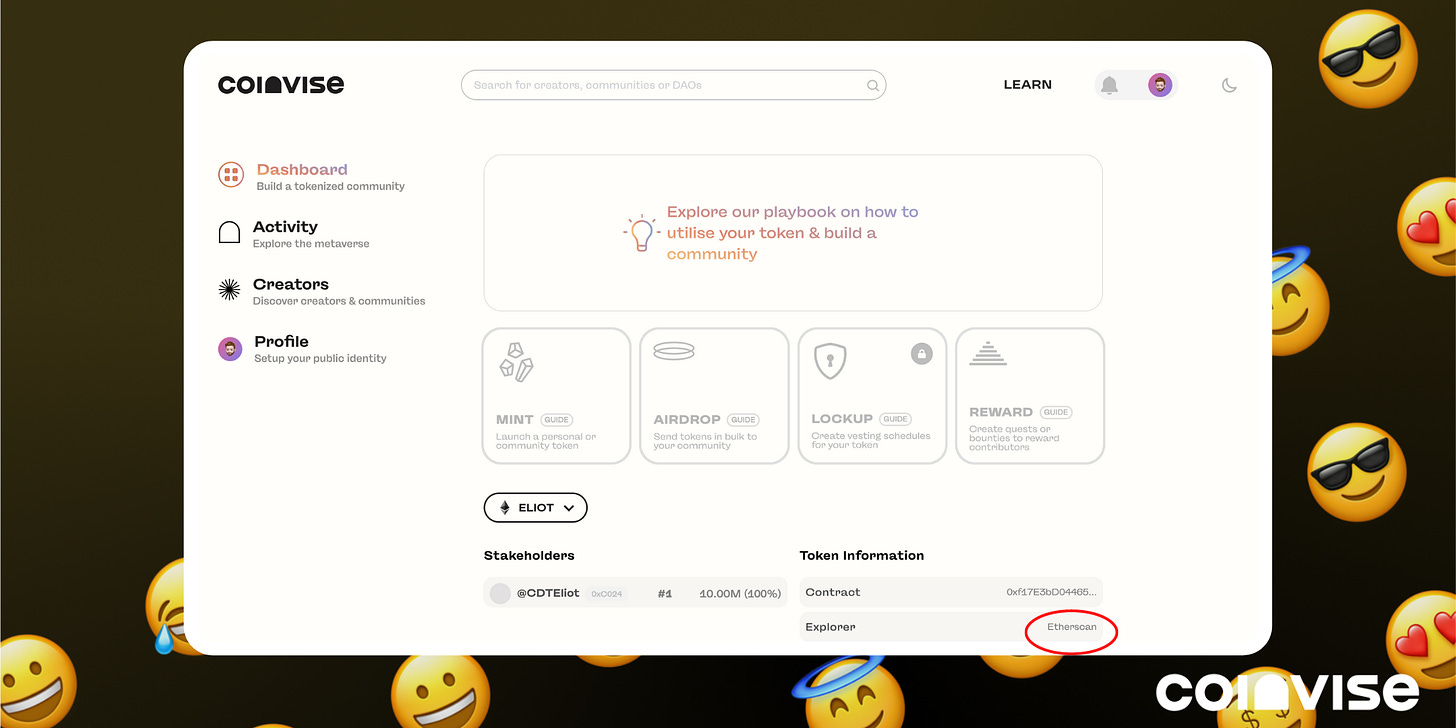
Step 1: Once you’ve created your Token, go over your Dashboard and click on Etherscan in the Explorer, as shown in the image below. You’ll be redirected directly to Etherscan. 👇
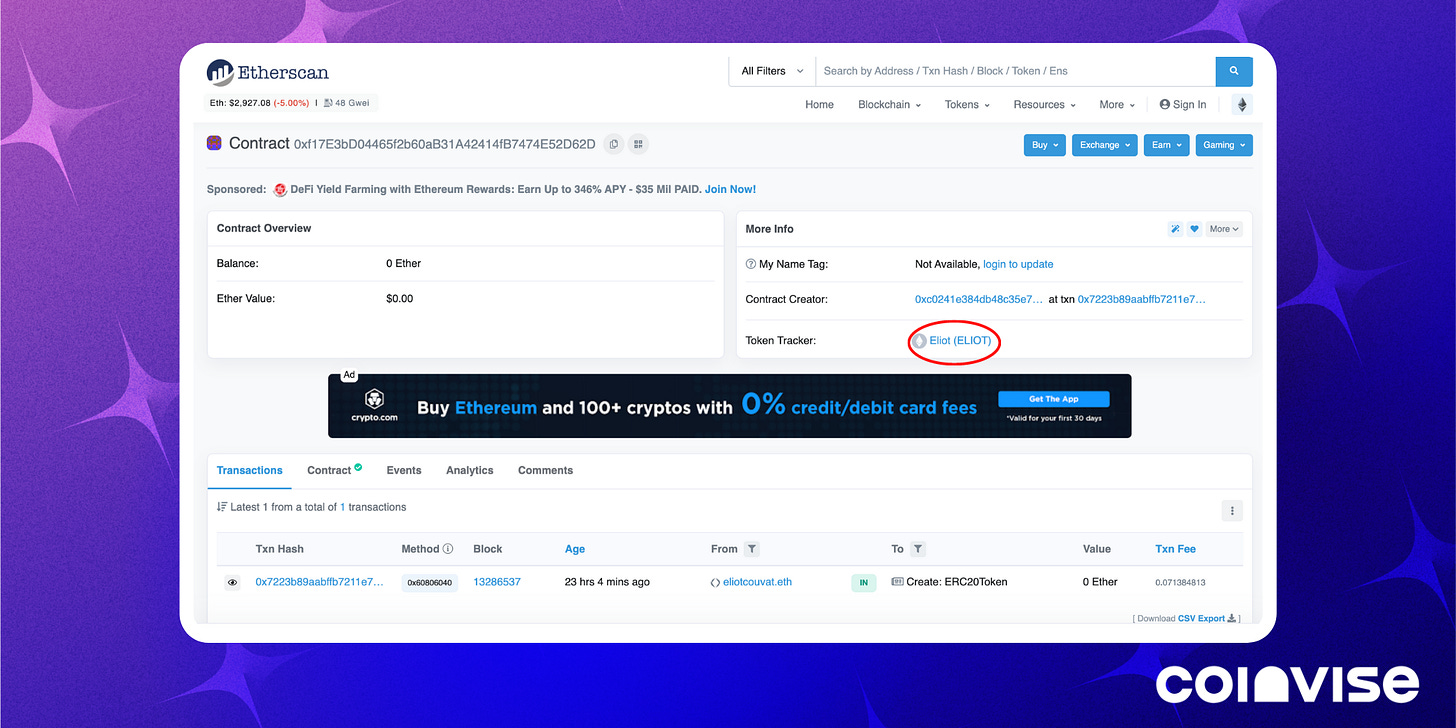
Step 2: Click on your token's name in the “Token Tracker” field, as highlighted in red below. 👇
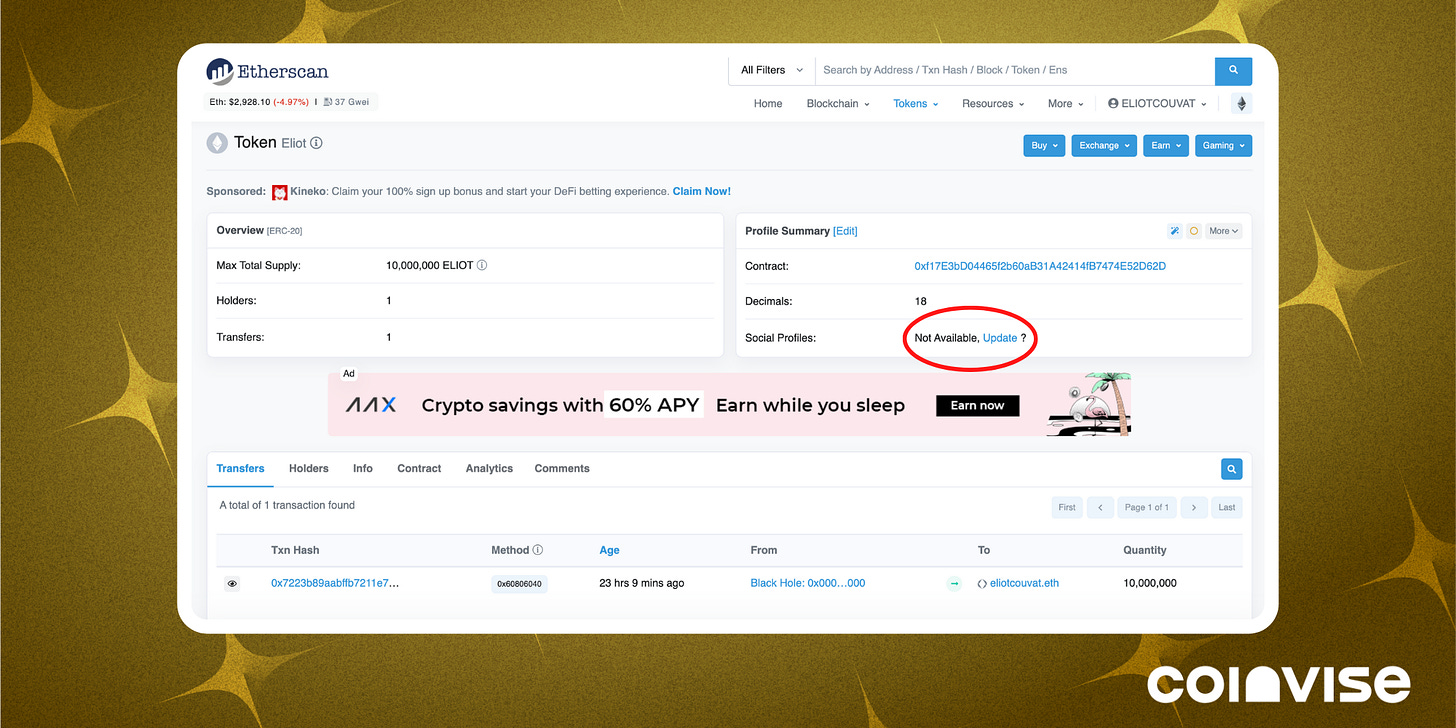
Step 3: In the “Social Profiles” field, click on the “Update” button, as shown in the image below. You’ll also find here your Token’s contract address. 👇
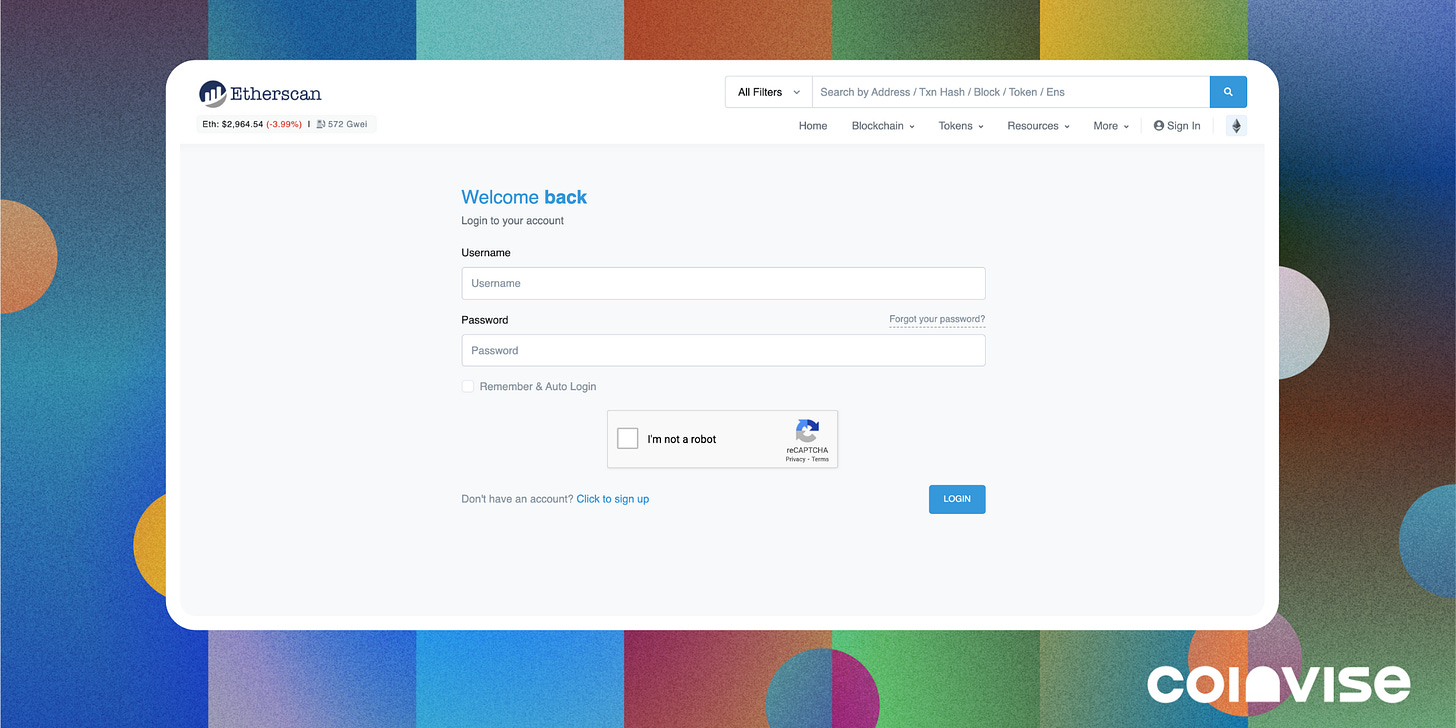
Step 4: You’ll be redirected to the login page. If you already have an account, simply login to your account. If you don’t yet have an account on Etherscan, click on the “Click to sign up” button. 👇
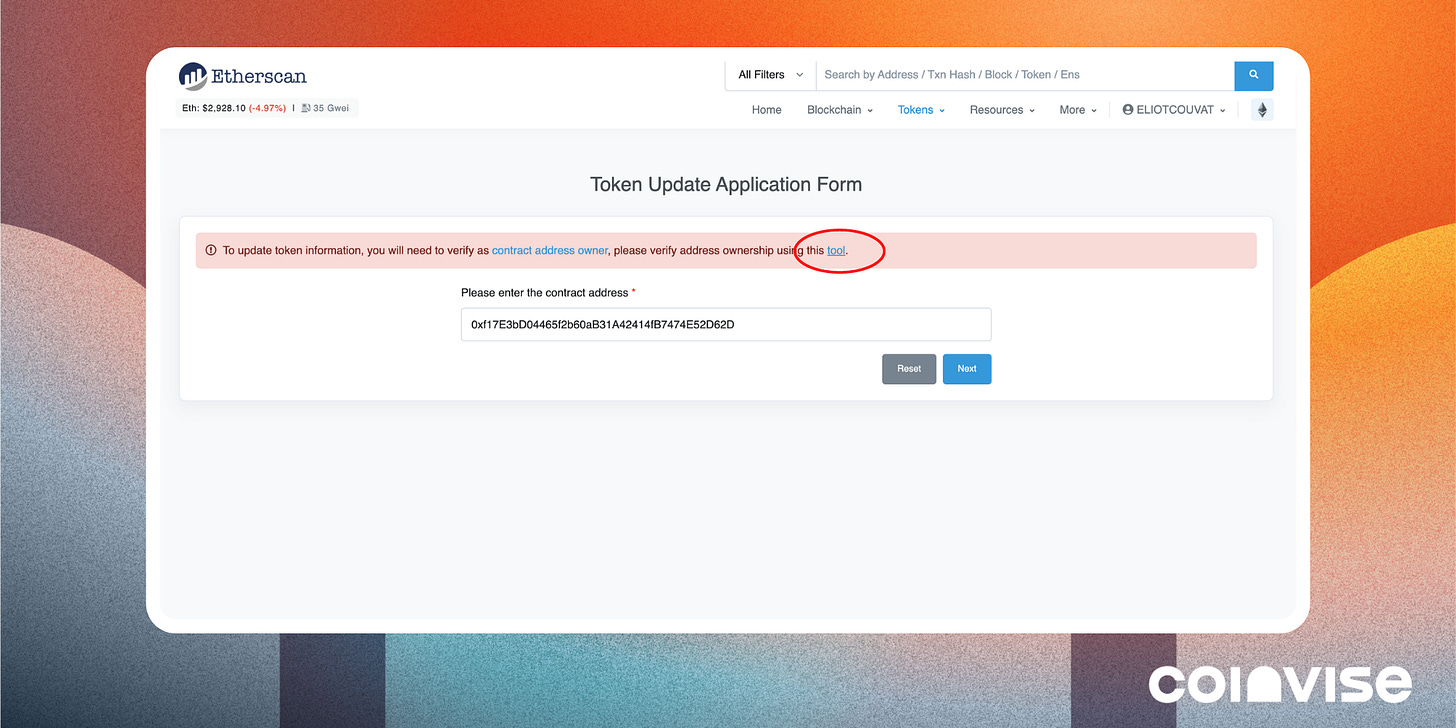
Step 5: You should now be redirected to the Token Update Application Form. You’ll have to verify the address ownership here. Click on the “Tool” button, as shown in the image below. 👇
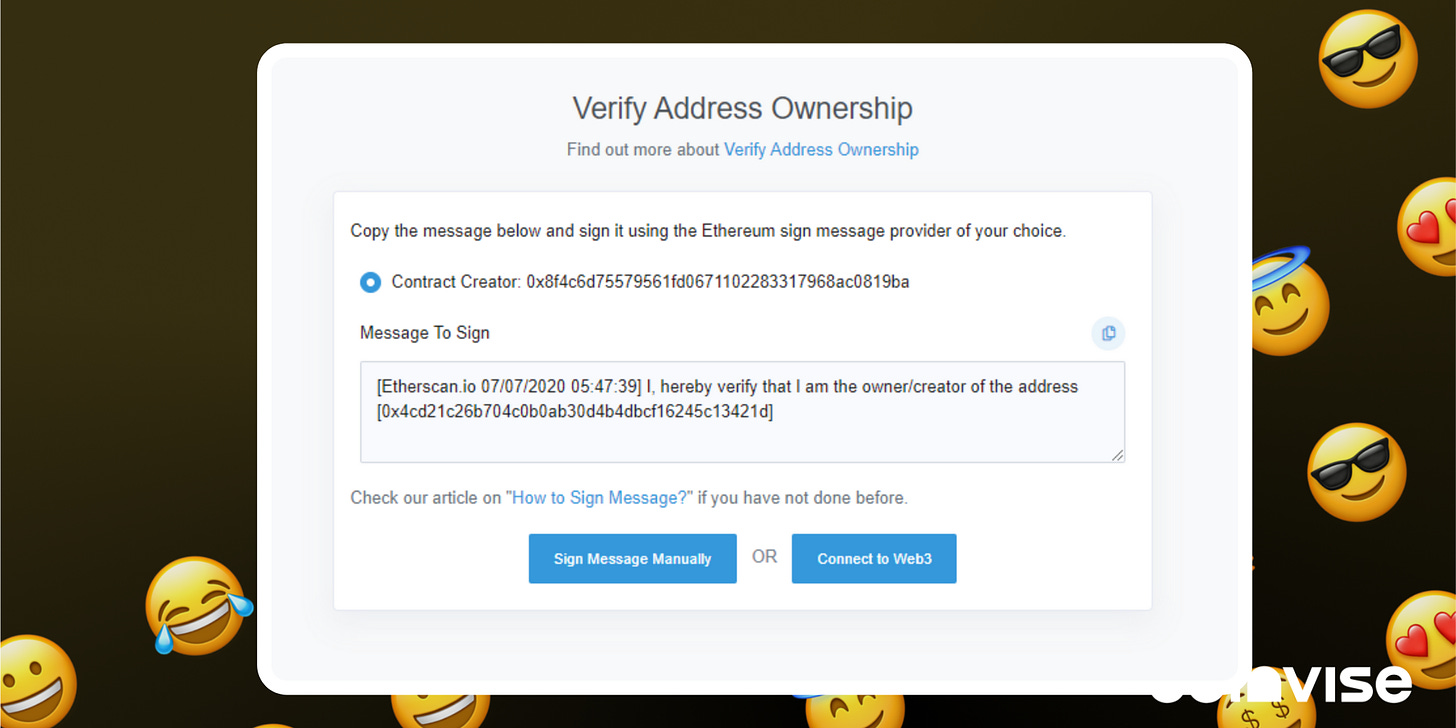
Step 6: To verify address Ownership, you have two options. If you have a Metamask wallet, simply click on “Connect to Web3” and follow the instructions. You should simply have to validate the transaction. (If you connect your Wallet at this stage, you can skip directly to step 14).
If you have any other Crypto Wallet (such as Rainbow Wallet), copy the text and click on the “Sign Message Manually” button. 👇
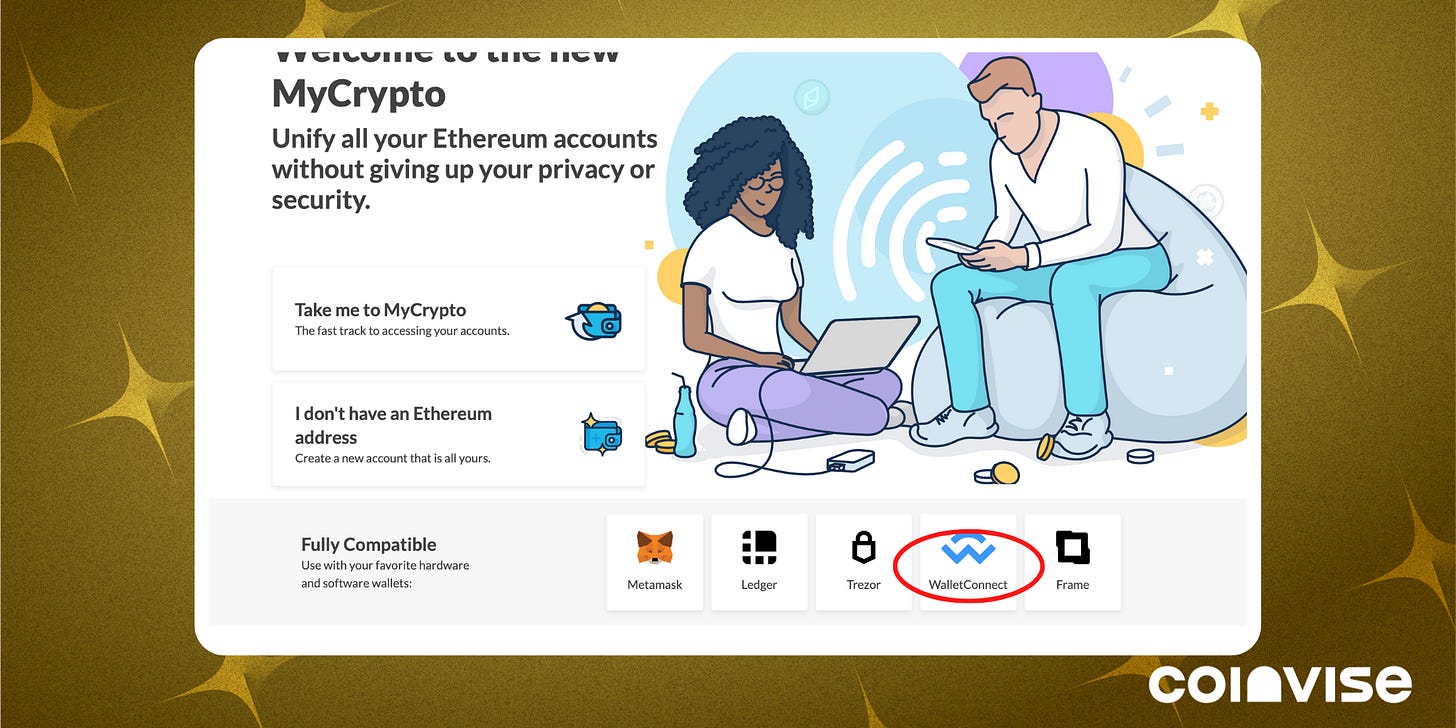
Step 7: Go on MyCrypto and click the “WalletConnect” button. 👇
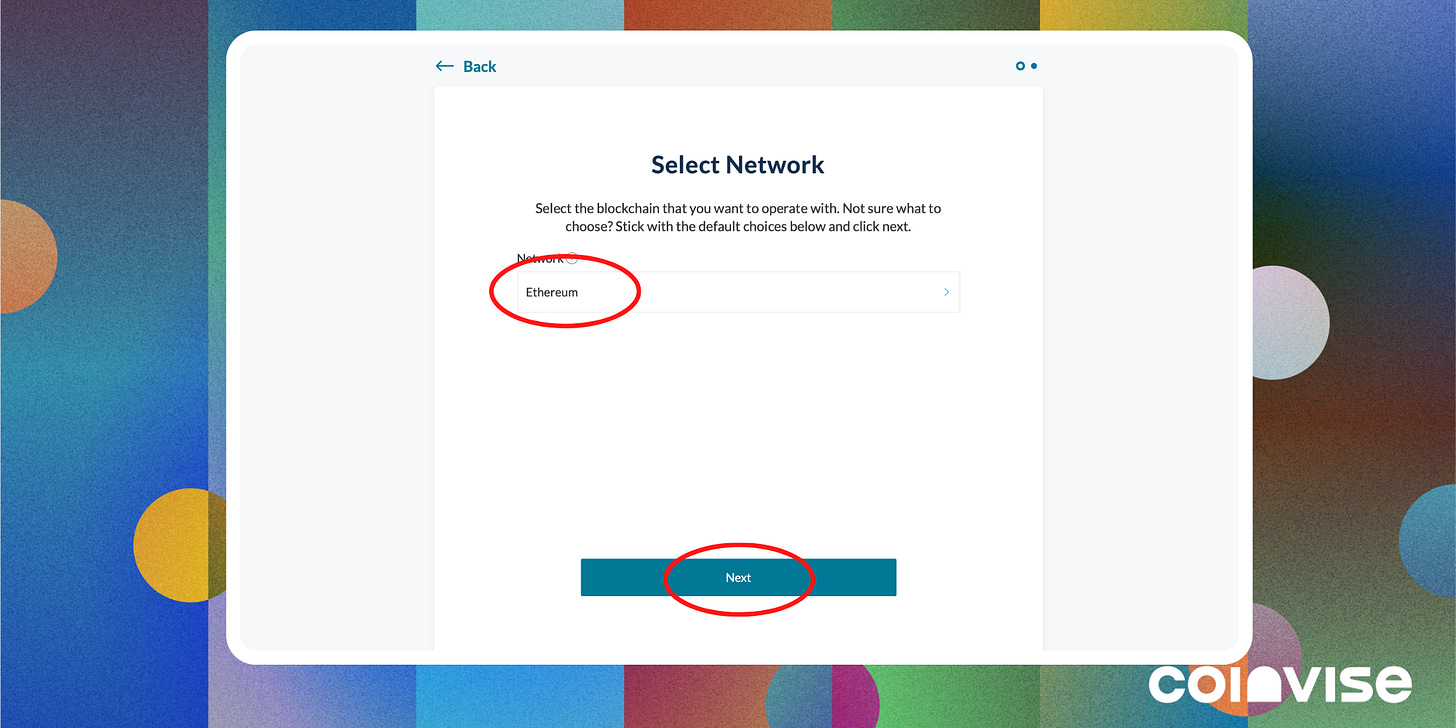
Step 8: Select the “Ethereum” Network and click on “Next”. 👇
Step 9: Connect your Crypto Wallet to Mycrypto. Simply follow the instructions on your screen, scan the QR code directly from your Rainbow mobile app and accept the transaction on your app. 👇
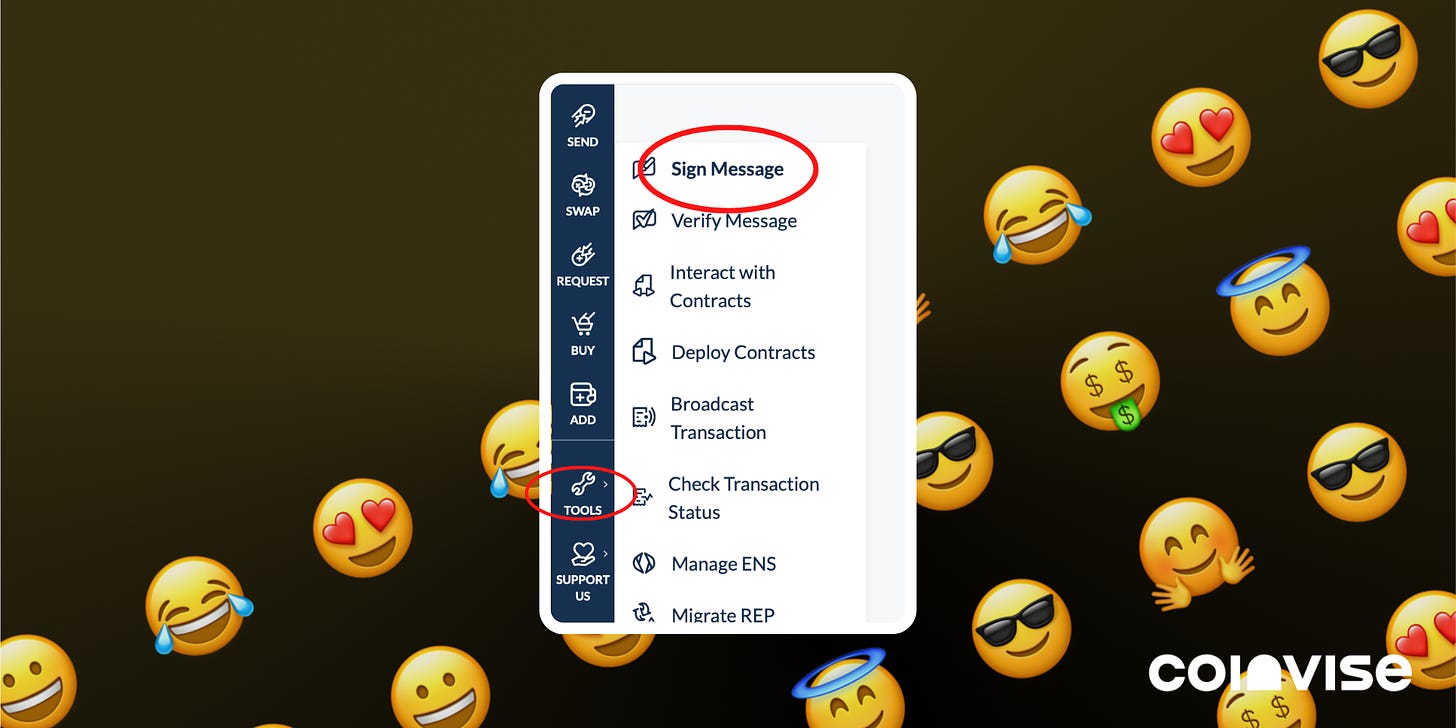
Step 10: On MyCrypto, head over “Tools” in the menu bar on the left of your screen, and click on the “Sign Message.” 👇
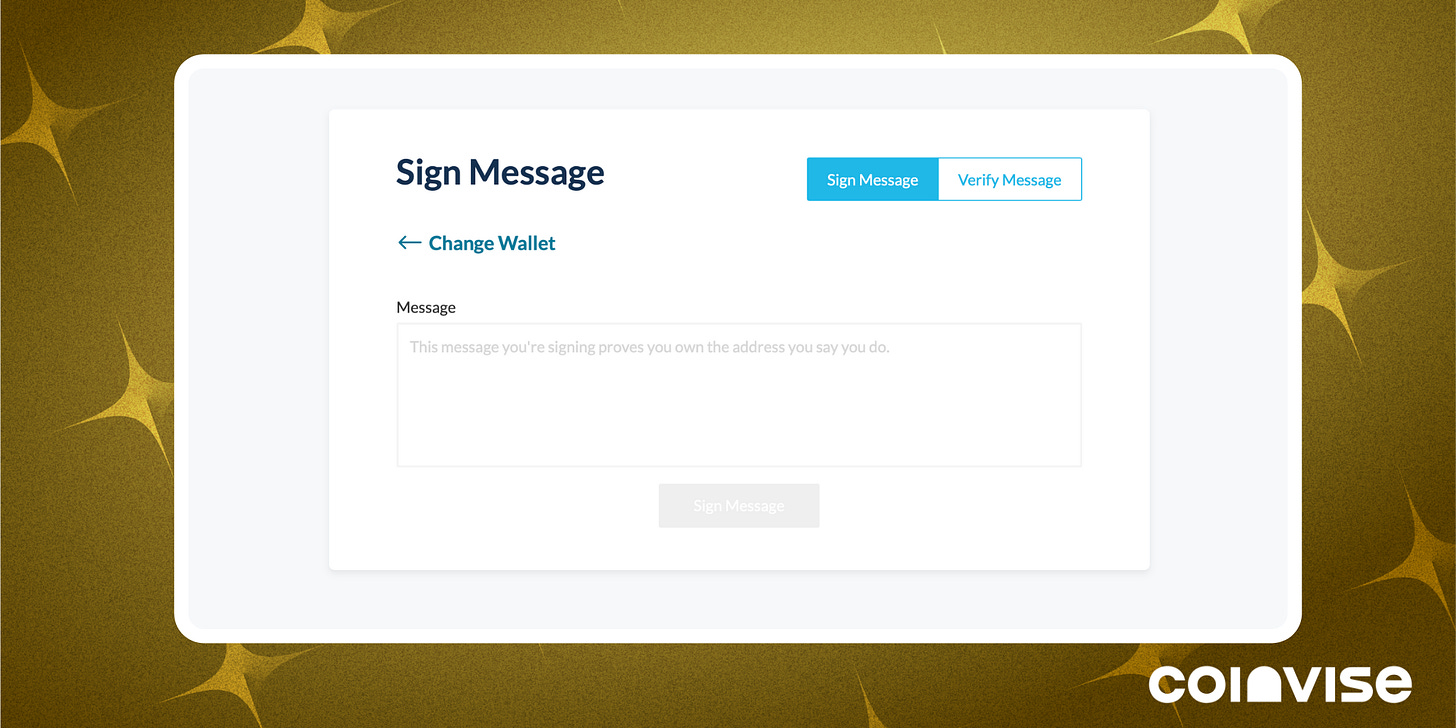
Step 11: Paste the message you’ve copied in step 7 and click on the “Sign Message” button. Go to your Wallet and validate the transaction. 👇
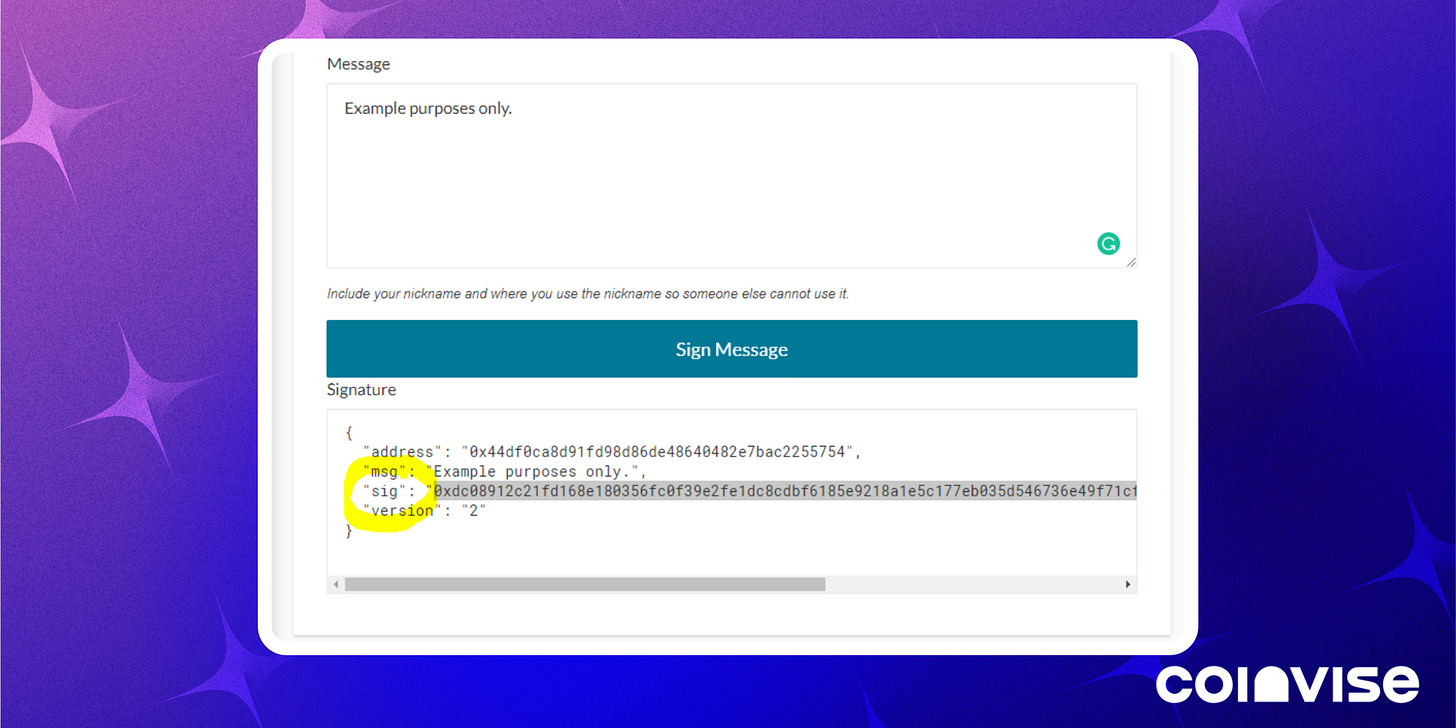
Step 12: Once the transaction has been approved, you’ll see appear a box under the “sign message” button. Copy the “Sig” as shown in the image below and go back to Etherscan. 👇
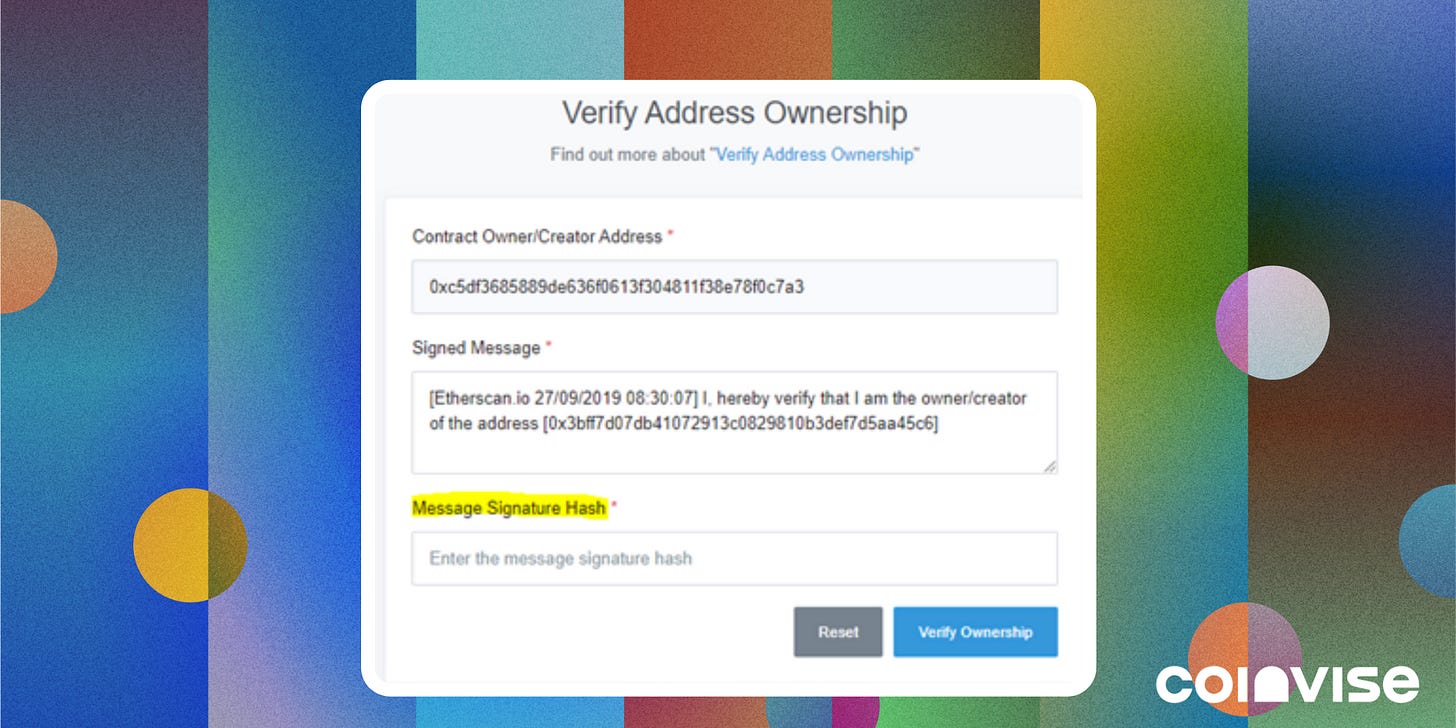
Step 13: Paste the “sig” under Message Signature Hash as shown in the image below. Now click on the “Verify Ownership” button. 👇
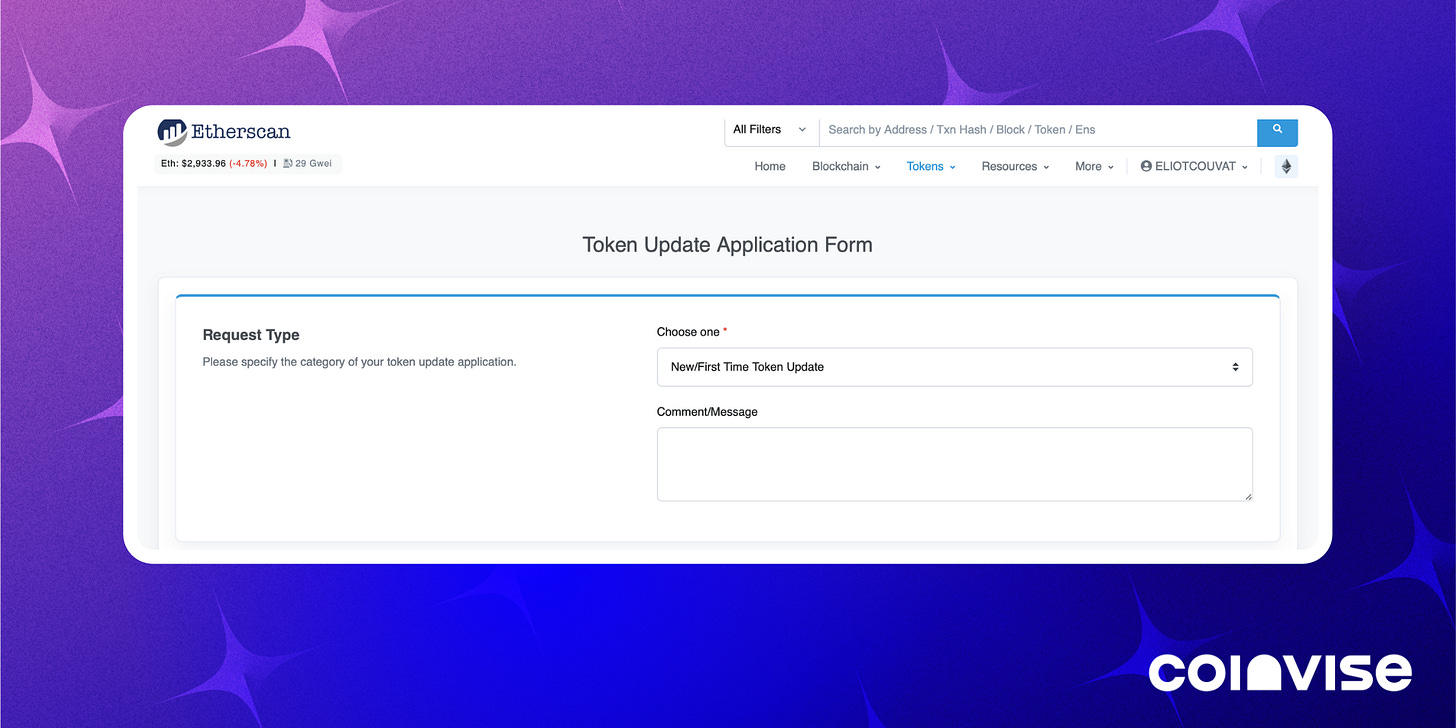
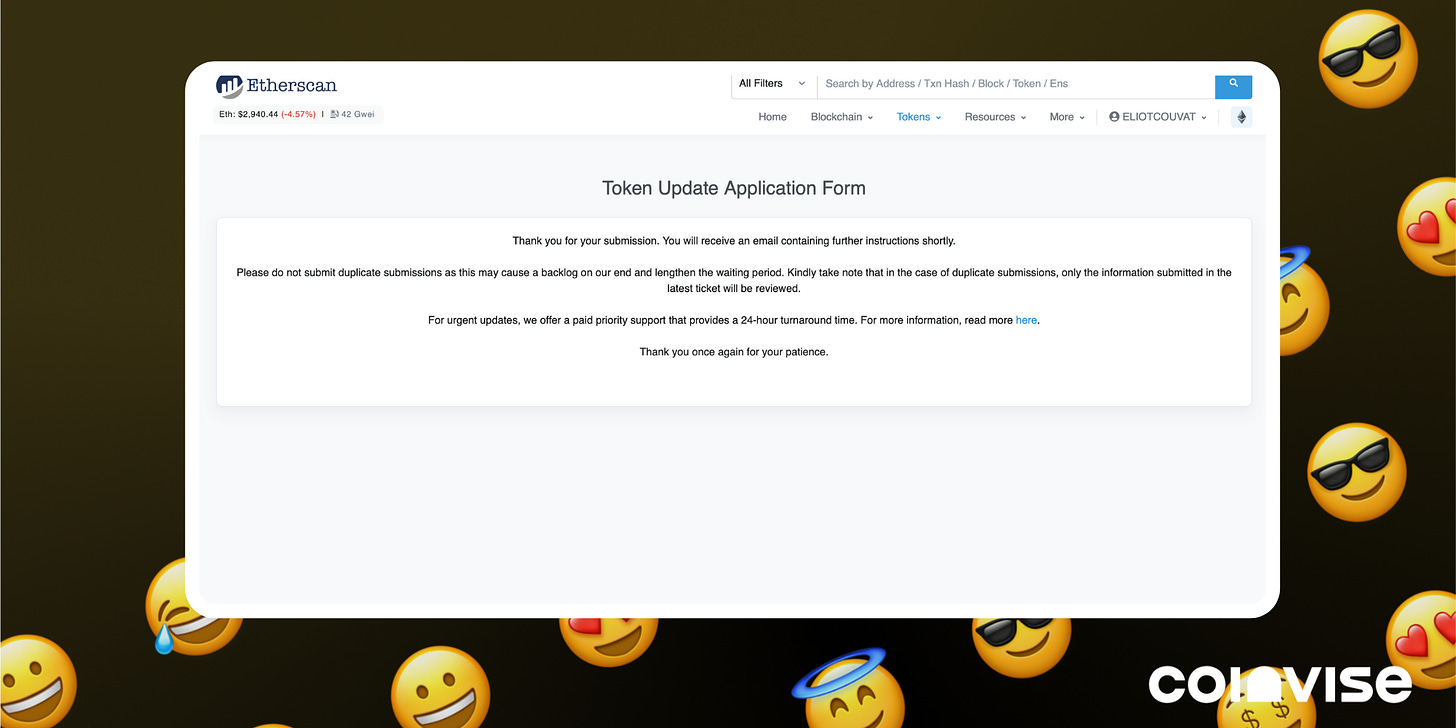
Step 14: Once you’ve verified the address ownership, you can now fill out the Token Update Application Form. 👇
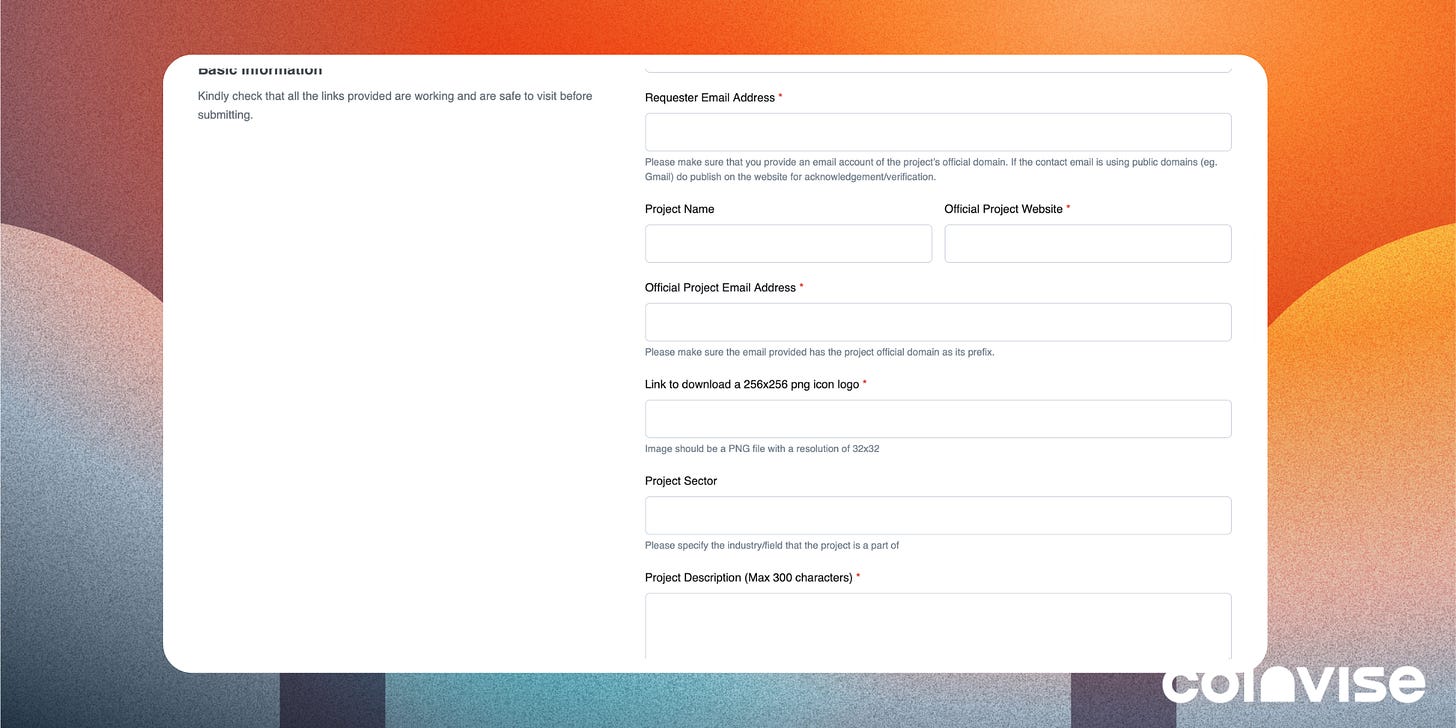
Step 15: Under “Link to download a 256x256 png icon logo”, add a link to the logo you want to use for your Token. If you don’t know how to create a logo go to the next step. If you know how to do a token, you can skip directly to step X. 👇
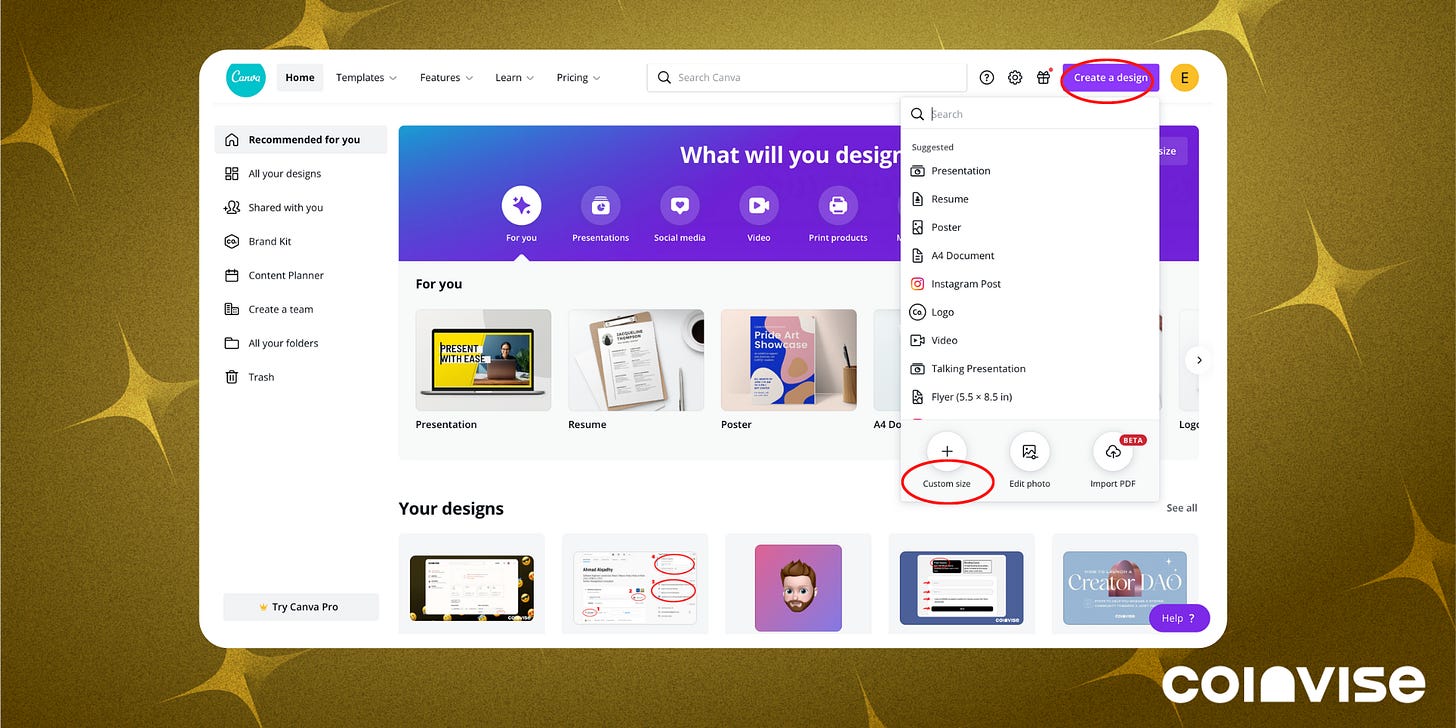
Step 16: You can create a logo on Canva. Go to canva.com, Click on the “Create a logo button” on the upper right corner of your screen, select the “special dimension” button, and create a 256x256 canvas. Once you’ve designed your logo and downloaded it, put your logo on Google Drive. 👇
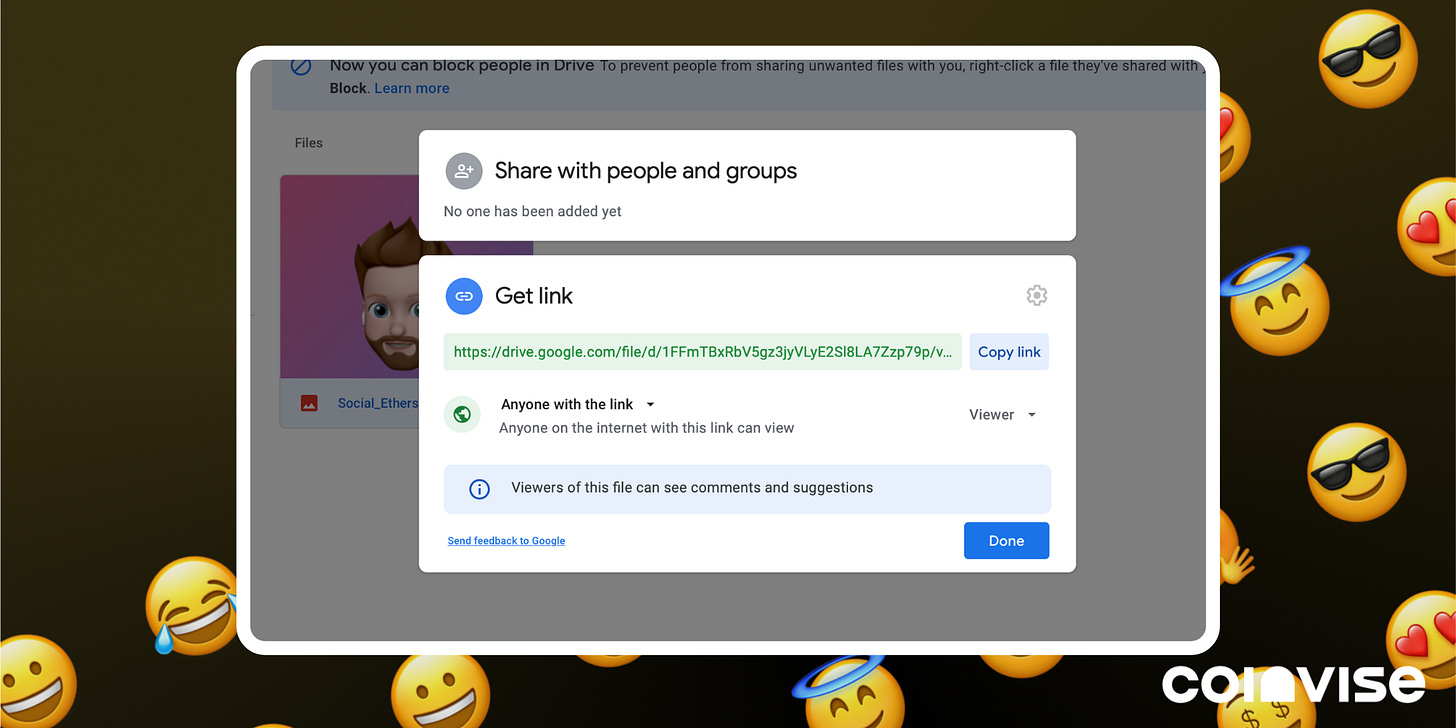
Step 17: On Google Drive, once your logo is uploaded, right-click on your logo, click on “share,” then under “Get Link,” click on “Change.” You’ll see the same screen as in the image below, select the “Anyone with the link” option and copy the link. You can now paste this link under “Link to download a 256x256 png icon logo” on Etherscan. 👇
Step 18: Congrats, you’re all set. You should receive an email from the Etherscan team and your logo will be updated shortly. 🎉🔥
Want more?
Follow us on Twitter, Instagram and join us on Discord 🔥
Thanks for being here!
Further resources: